I received my little forty and some other goodies. Mixed feelings, I will let you know in the end..
By the time I receive it, the spanners come out and remain on fire for a couple of hours.
The facts.
It was stiff when turning the flywheel. I realized that the reason was the dry gearbox. I filled it with diesel and gently started turning back and forth the flywheel. That helped and it finally turned free. Later I will open the gearbox for a proper cleaning.
After managing to turn free the flywheel I found out that the coil was dead.
I started removing the head. Pretty tricky procedure. The worst thing was the products of galvanic corrosion between the holes of the cylinder head and the studs. That thing prevented the removal of the head. My beloved knife (you will see it in a picture lying around somewhere) did all the job avoiding screwdriver hits etc on the head, head gasket etc.
Once the head was removed the rest were a piece of cake. The exhaust were easily removed so I managed to take of the cylinder. Piston, bore, cases etc were nice and clean, that may be a result of the diesel I was pouring through the carb inlet while turning the flywheel.
Studs looks in fair condition but I would like your opinion about that. Is there a good reason why I should remove them or should I just leave them as they are?
Tank! The most difficult part for me. My torch is not strong enough to remove the ends and the seller did the dumbest package I have ever seen. Result? More dents or deformation of the tank, broken Bakelite spark plug and a smashed 8 com spark plug. That's the reason for the mixed feelings. Anyway..
Let's get to the pictures. I would also like to point to any non original part. The lever maybe?


Gaskets in rather reusable condition. They have some porous but not excessive corrosion.


Debris was loose, with little effort it was almost clean.

The tiller arm cracked due to corrosion. Is it also chopped off?

Some kind of filler was applied to repair corrosion. I think I will have to do the same.

Original or..?


The handle was straight before shipping....

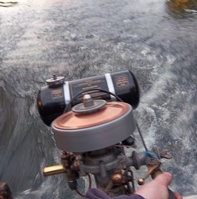
The beauty.
Any comments welcomed!