Page 1 of 2
SD4164L3
Posted: Mon Sep 02, 2013 6:29 pm
by Keith.P
Started on another motor, always wanted a war time motor, just started stripping it down, should be fun.
IMG_0390.JPG
Did some work on the carb first.
Re: SD4164L3
Posted: Mon Sep 02, 2013 7:17 pm
by Oyster 49
Happy birthday by the way

Re: SD4164L3
Posted: Mon Sep 02, 2013 7:23 pm
by skyetoyman
Get a brass trumpet off John. Looks good on the engine.
Re: SD4164L3
Posted: Wed Sep 04, 2013 6:50 pm
by Keith.P
So far work is proceeding as expected, slowly.
I had to replace the top crank bush as it was damaged and binding up.
Picture below, left is the damaged one, as it came out, the black mark on the one on the right is from the oil hole, don't
know if that's right or not.
IMG_0417.JPG
Anyway the crank bush has been fixed and crank refitted, all well so far.
Even though the motor is covered in lacquer, It has served this motor well and all looks good underneath, not so good when it comes to the drive tube, but that's in the process of being plated at the moment, along with the clutch rod, not chrome, but a nice old grey.
Not looking forward to doing the exhaust, with that amount of baked on lacquer.
IMG_0419.JPG
A lot more painting and cleaning still to do
IMG_0420.JPG
Re: SD4164L3
Posted: Wed Sep 04, 2013 7:20 pm
by Stelios_Rjk
After replacing the bushes, shouldn't the new set be reamed with the Seagull special reamer? After asembling the two halves of the crankcase etc?
The black mark may have been drilled to let the oil lubricate more efficiently.
Re: SD4164L3
Posted: Wed Sep 04, 2013 7:32 pm
by Keith.P
I don't know about a special seagull reamer, but I have made up crank and big end bushes before on my old Myford and have had no problems as yet.
Re: SD4164L3
Posted: Wed Sep 04, 2013 7:37 pm
by Stelios_Rjk
CharlesUK I believe can enlight us!
Re: SD4164L3
Posted: Wed Sep 04, 2013 9:08 pm
by Oyster 49
I do like seeing an old engine come to life and reveal it's condition
As you say, the lacquer has done a good job. Will paint stripper and a plastic scraper sort that out?
I use wet and dry to clean up brass exhausts, working down to 1000 grit, then elbow grease...A buffing wheel would be great!
Re: SD4164L3
Posted: Wed Sep 04, 2013 9:53 pm
by Keith.P
You can see in the last picture the buffing wheel, its working overtime at the moment on this restoration.
I will have to give the paint stripper a go, didn't think of that.
Re: SD4164L3
Posted: Wed Sep 04, 2013 10:51 pm
by Charles uk
Sorry to say this Keith, but those bushes you've removed are not SD bushes, the correct bushes are no longer available & I know you've got Pb 2 bronze, a lathe & a reamer & your well capable of making a new set.
Can't wait for the end result pics.
Re: SD4164L3
Posted: Thu Sep 05, 2013 10:56 am
by Charles uk
Does anyone have an open SD crankcase, so that they can take pics of the bearings, to show how different they are?
Re: SD4164L3
Posted: Thu Sep 05, 2013 12:16 pm
by Stelios_Rjk
Pictures on the way...
Re: SD4164L3
Posted: Thu Sep 05, 2013 12:40 pm
by Stelios_Rjk
Upper..
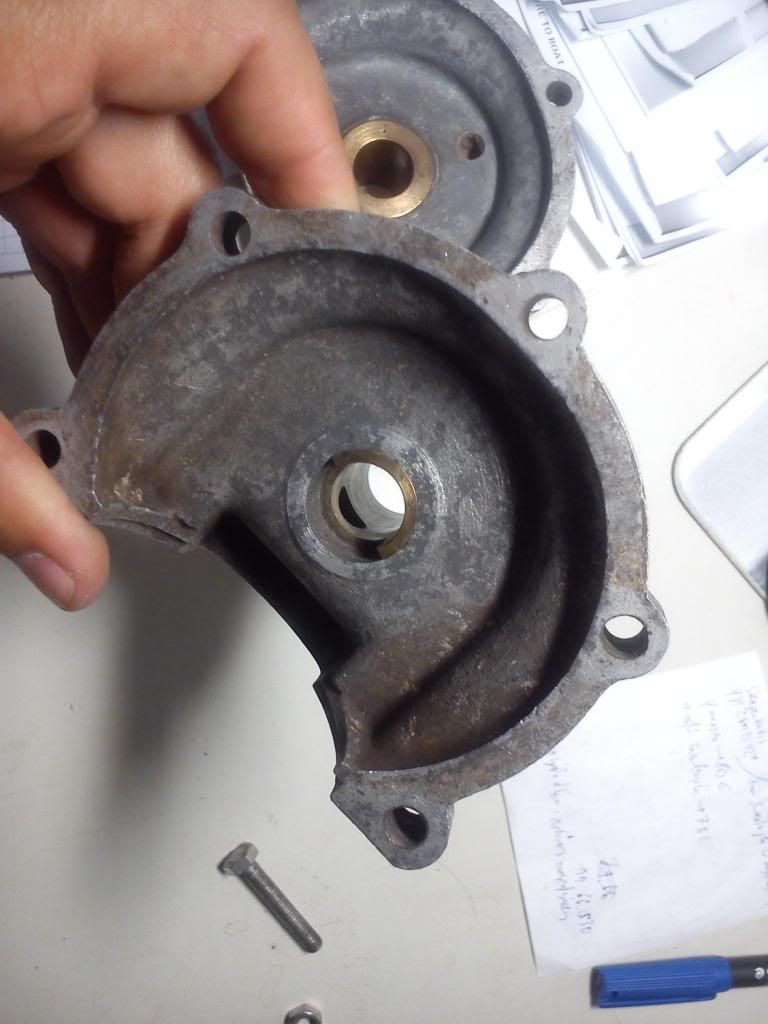
Lower..
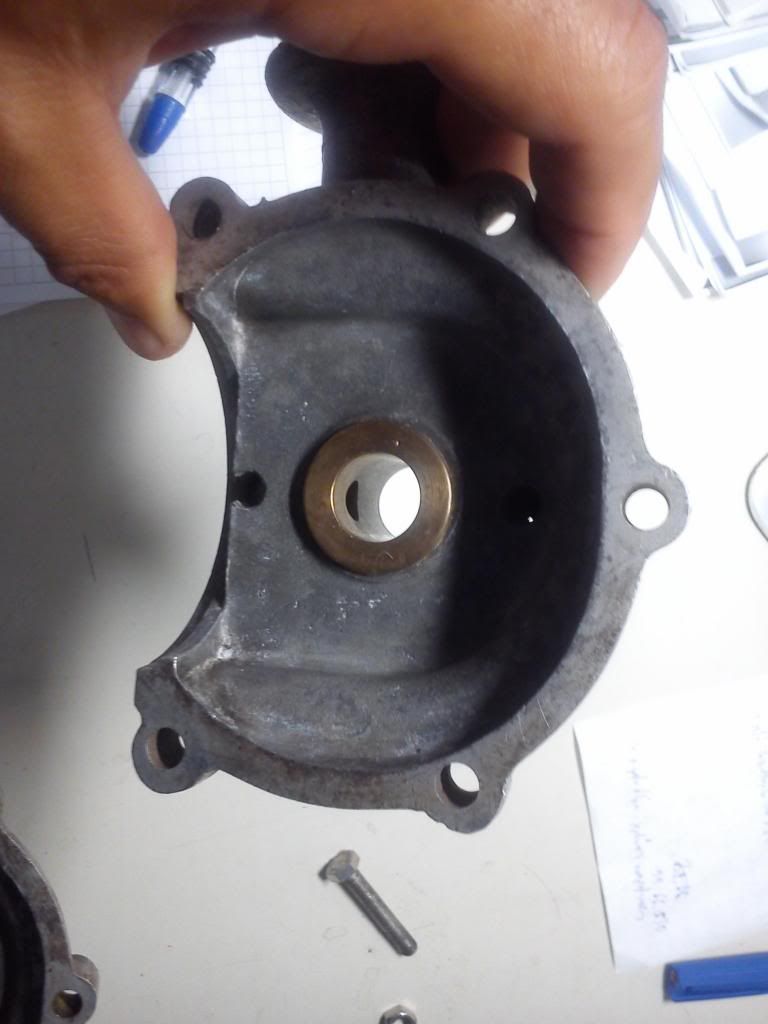
Both..
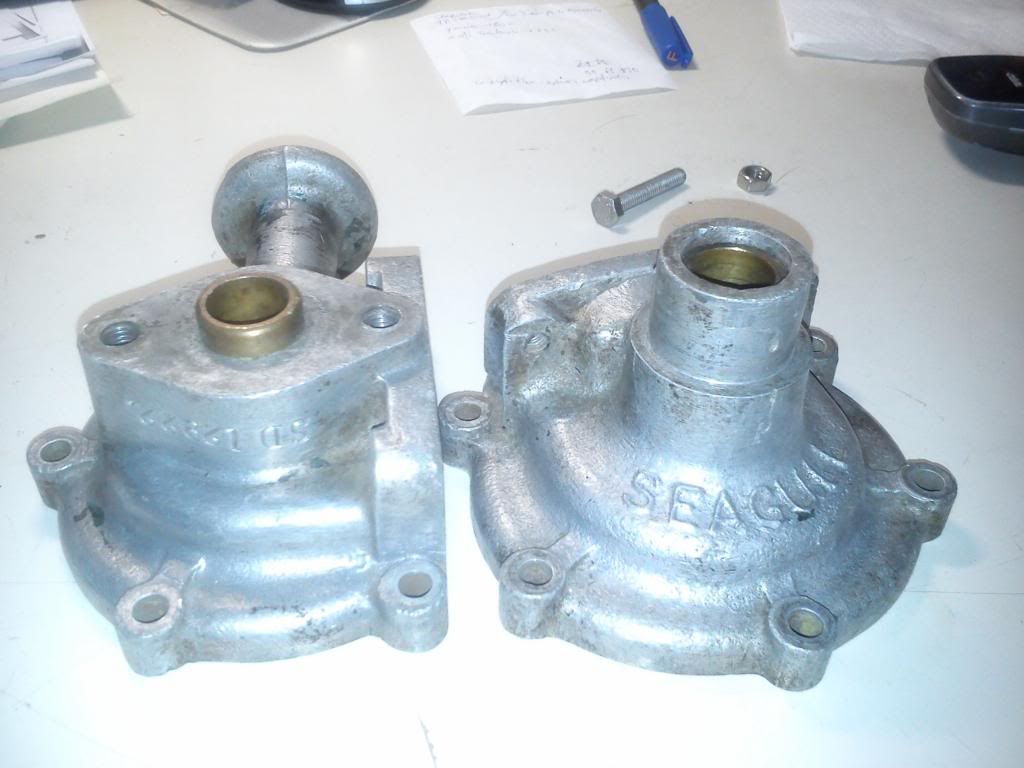
On the lower case the hole of the bush is blind. Shouldn't have been drilled the crankcase to let oil go through the hole of the bush?
It's a spare crankcase but with matters..
I also have two sets of bushes from silver centuries if those could be of any use to anyone.
Re: SD4164L3
Posted: Thu Sep 05, 2013 1:08 pm
by Keith.P
That's the style I have made up, if it works for other SD's it will work for me, I'm not going to make another one, as I have already moved on.
Re: SD4164L3
Posted: Thu Sep 05, 2013 6:10 pm
by Oyster 49
Was there much crud in the water jacket?


