FVP10021
Moderators: John@sos, charlesp, Charles uk, RickUK, Petergalileo
Re: FVP10021
Nice job stelios! It amazes me to see a gearbox full of dried grit and then find the gears clean up ok 
-
Stelios_Rjk

- Posts: 1458
- Joined: Sun Jun 17, 2012 10:15 pm
- Location: Athens - Greece
Re: FVP10021
Thanks Oyster! Wait to see the tank...
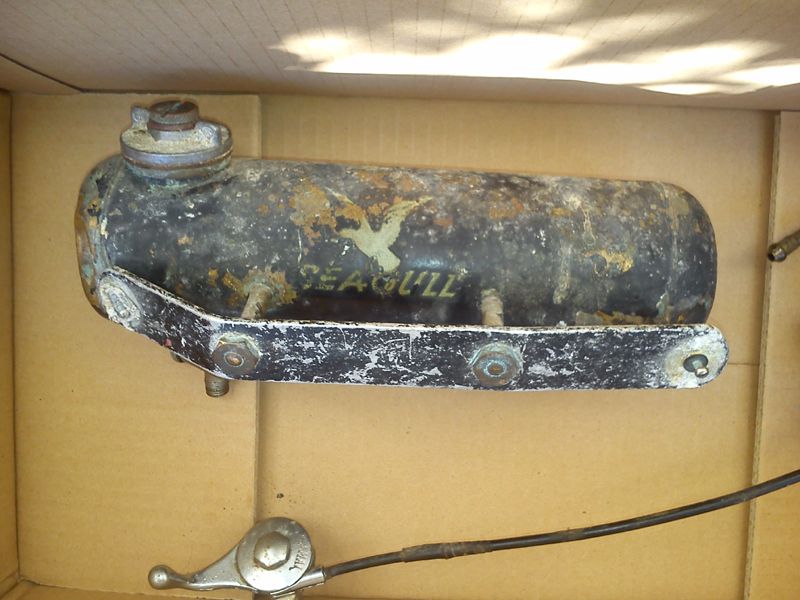
I managed to take off the end next to the fuel cap. The way I did it was a little bit tricky as my torch is not big enough. To build up and maintain sufficient temperature I filled the tank with some sand mixed with small pebble. The trick worked but the pebble shouldn't be there. One of them was in touch with the tank's end and build up so much temperature to melt and create a hole to the brass Thus the solder on the end. Of course I managed to retain the shape of the tank to a point. Thanks to Manos we closed the tank. Now it remembers a lot more a tank than before. It will need a lot of car body filler to be ready for paint.
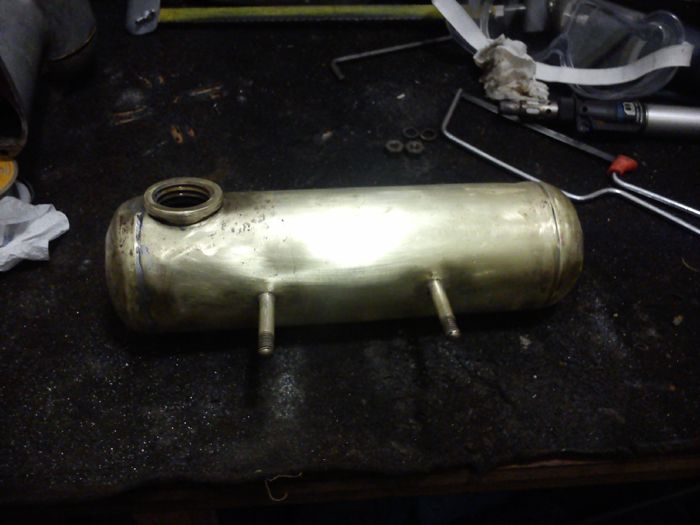
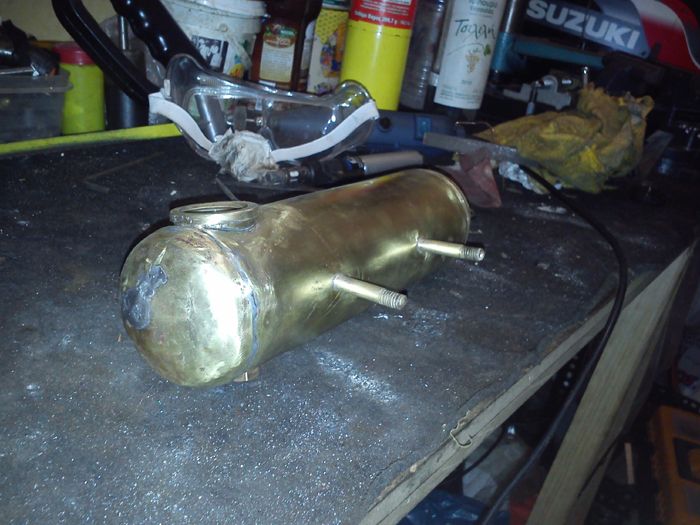
Now I am putting solder on those silly threads that used to hold the handle.

I managed to take off the end next to the fuel cap. The way I did it was a little bit tricky as my torch is not big enough. To build up and maintain sufficient temperature I filled the tank with some sand mixed with small pebble. The trick worked but the pebble shouldn't be there. One of them was in touch with the tank's end and build up so much temperature to melt and create a hole to the brass


Now I am putting solder on those silly threads that used to hold the handle.
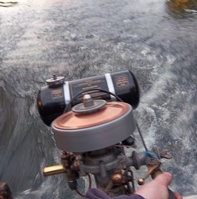
I love the 10600/145 turns!!!

Re: FVP10021
nice work stelios
Re: FVP10021
the lesson I have learnt with tanks, is to be patient, be more patient and then be very patient Apply filler and rub most of it off, apply more and repeat until you get the shape, use fine wet and dry to smooth it more. I then put a couple of coats of etch primer, then at least 3 coats of filler primer, leaving overnight between coats and rubbing back with 1000 wet and dry between coats. The same with the black, paint, rub down well between coats and build up the finish.
Leave the black paint for at least a week to harden then finally flat with 1200 or even 2000 wet and dry, clean and apply the decal, leave overnight for the decal to dry. buy 2 decals in case you are not happy with the first one.
finally apply the lacquer, not too thick..leave for several weeks to harden, then a very light T cut or similar rubbing compound. a neat trick is to then not use wax polish, I find it gives an almost old looking! but new patina.
Did I mention to be patient? It thanks me perhaps 2 weeks to do a tank, and then several more leaving the paint to harden.
Leave the black paint for at least a week to harden then finally flat with 1200 or even 2000 wet and dry, clean and apply the decal, leave overnight for the decal to dry. buy 2 decals in case you are not happy with the first one.
finally apply the lacquer, not too thick..leave for several weeks to harden, then a very light T cut or similar rubbing compound. a neat trick is to then not use wax polish, I find it gives an almost old looking! but new patina.
Did I mention to be patient?
-
Stelios_Rjk
- Posts: 1458
- Joined: Sun Jun 17, 2012 10:15 pm
- Location: Athens - Greece
-
Stelios_Rjk
- Posts: 1458
- Joined: Sun Jun 17, 2012 10:15 pm
- Location: Athens - Greece


-
Collector Inspector

- Posts: 4196
- Joined: Sun Jun 29, 2008 4:32 am
- Location: Perth Western Australia
- Contact:
-
Collector Inspector
- Posts: 4196
- Joined: Sun Jun 29, 2008 4:32 am
- Location: Perth Western Australia
- Contact:
Re: FVP10021
Keith.P wrote:C.I. have a look again, between the cable and the guide, its only a short stop, I don't have it on my finished FVP, but I think I changed the carb on that one, goes a lot faster without it.
YEP!
B
A chicken is one egg's way of becoming others
-
1650bullet

- Posts: 669
- Joined: Wed Jun 13, 2012 9:52 pm
- Location: Australia
Re: FVP10021
Fuel tank has come up well". A few good coats of paint and a decent clear coat will make it last. Decals from john are easy to fit as well, so don't panic to much about them.
-
Collector Inspector
- Posts: 4196
- Joined: Sun Jun 29, 2008 4:32 am
- Location: Perth Western Australia
- Contact:
Re: FVP10021
Decals always fill me with dread 
I tend to break more than I successfully fit.
I used to have a contact who breased it like "so what is the problem". Sadly She is interstate now. She just had a steady hand I guess......................
B
I tend to break more than I successfully fit.
I used to have a contact who breased it like "so what is the problem". Sadly She is interstate now. She just had a steady hand I guess......................
B
A chicken is one egg's way of becoming others
-
1650bullet
- Posts: 669
- Joined: Wed Jun 13, 2012 9:52 pm
- Location: Australia
Re: FVP10021
Spray on plenty of soapy water and you have ages to slide to decal into position.
http://www.youtube.com/watch?v=QatqOxNlZ8A
http://www.youtube.com/watch?v=QatqOxNlZ8A
-
Stelios_Rjk
- Posts: 1458
- Joined: Sun Jun 17, 2012 10:15 pm
- Location: Athens - Greece
Re: FVP10021
Hi guys,
What I do to fit the decals is to dip them in a bowl full of water for a second. Then I have to fit them on the correct point. After a minute the cardboard can be removed. No soap of course, I would be afraid to use it, don't know the result when combining it with the varnish later.
What I do to fit the decals is to dip them in a bowl full of water for a second. Then I have to fit them on the correct point. After a minute the cardboard can be removed. No soap of course, I would be afraid to use it, don't know the result when combining it with the varnish later.
I love the 10600/145 turns!!!
Re: FVP10021
Give the decals plenty of time to try, I did one and I think maybe the lacquer get underneath the decal and the decal started to go darker and disappear, it did look good for a time.
-
Stelios_Rjk
- Posts: 1458
- Joined: Sun Jun 17, 2012 10:15 pm
- Location: Athens - Greece
Re: FVP10021
Some progress!
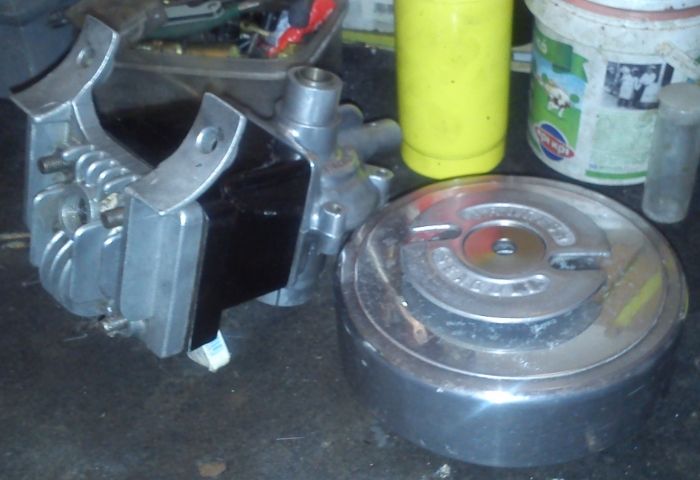
Any tip to clean the difficult points of the head around the spark plug hole? Thanks in advance.

Any tip to clean the difficult points of the head around the spark plug hole? Thanks in advance.
I love the 10600/145 turns!!!
-
Collector Inspector
- Posts: 4196
- Joined: Sun Jun 29, 2008 4:32 am
- Location: Perth Western Australia
- Contact:
Re: FVP10021
Plug will hide it S
Getting serious with that aye?
All good, keep that up!
You do good work!
B
Getting serious with that aye?
All good, keep that up!
You do good work!
B
A chicken is one egg's way of becoming others